Adding Team Members
As a Company Administrator, you can invite site engineers, accountants, storekeepers, and project managers to join your Planmaster workspace.
Access this section from the sidebar under Settings > Users.
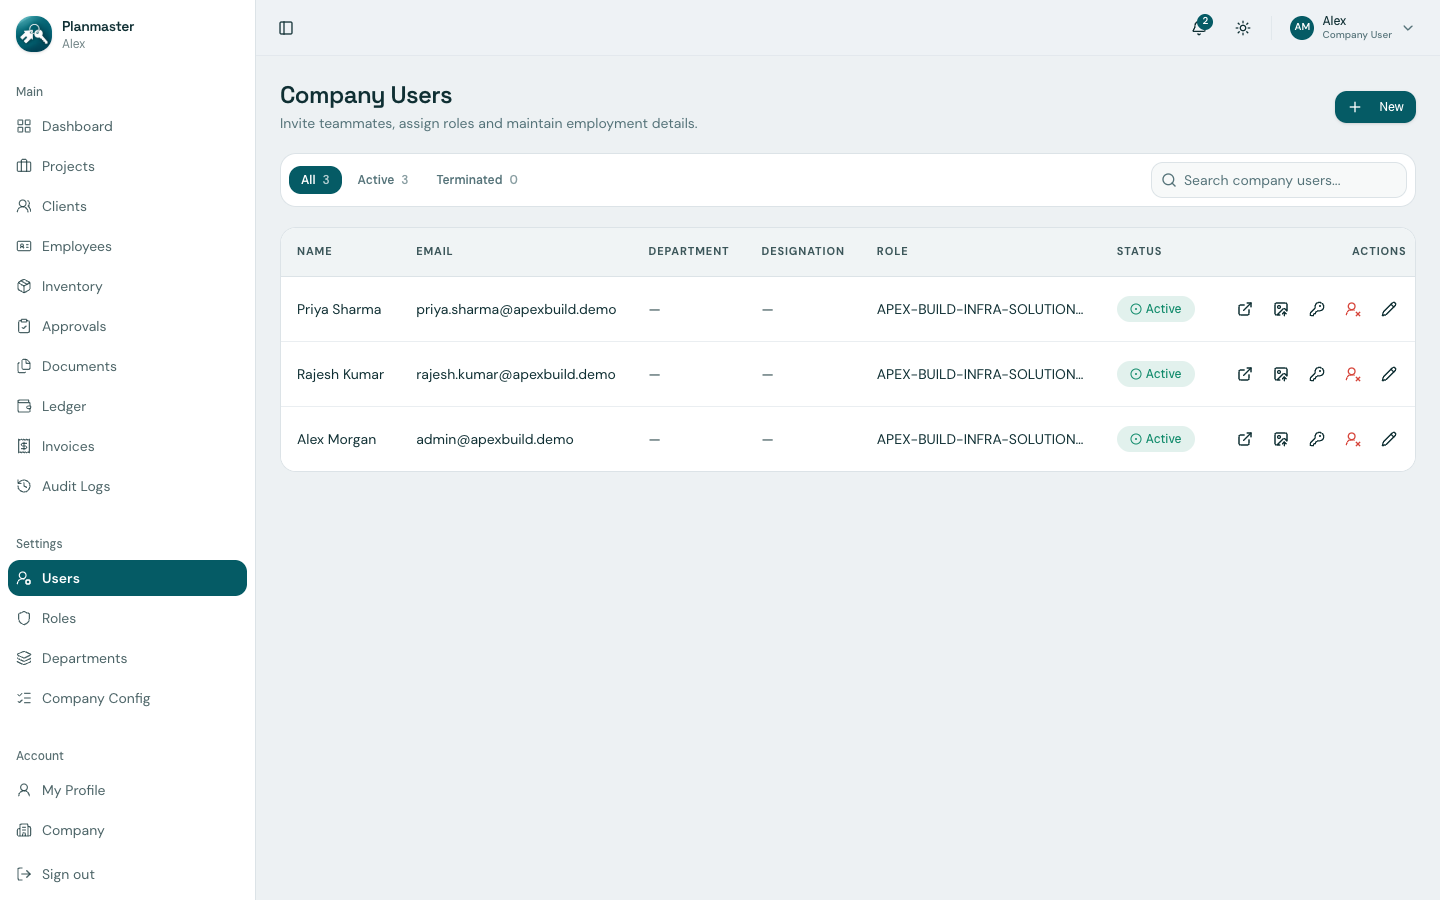
How to Invite a New Team Member (Step-by-Step)
- Click Settings > Users in the left sidebar menu.
- Click the blue New button in the top-right corner.
- Complete the user invitation form:
- Account
- Email *: Work email address (this acts as their login handle and notification destination).
- Password: Type a secure initial password (minimum 8 characters), or leave it blank to automatically email them a one-time setup link.
- Personal
- First name * & Last name *: Colleague's name (e.g., Rajesh Kumar).
- Phone & Date of birth: Optional contact details.
- Employment
- Department & Designation: Assign their division and job title (set these up first under Departments & Job Titles).
- Employment type:
Full time,Part time,Contract, orIntern. - Joining date & Status: When they started, and whether the account is
Activeor inactive. - Role *: Select their security access role:
ADMIN: Full company-wide control over finances, users, settings, and contracts.ENGINEER: Full project execution, milestones, DPRs, tasks, BOQ updates, and material requests.GENERAL_USER: Task execution, subtask checklists, and blocker reporting.- Or any custom role you created (e.g.,
STOREKEEPER). - Reports to: Select their manager for the reporting hierarchy shown on their Employee Profile.
- Emergency contact: Name and phone number to call in a site emergency.
- Click Create.
Your colleague can now visit https://app.planmaster.in and log in immediately!
Managing Your Company's User Seats
Every Planmaster subscription tier includes a specific quota of active user seats (for example, 10 active users on the Pro Plan):
- Each active team member consumes 1 seat.
- You can monitor seat usage anytime under Account > Company (e.g.,
3 / 10 Active users). - Offboarding Staff: When an employee leaves your company, find their name under Settings > Users and click Terminate employee. Their status changes from
ActivetoTerminated(use the Active / Terminated filter tabs to review either group). - Their login access is revoked immediately.
- Their seat is instantly freed up so you can onboard a replacement without paying extra.
- Data Preservation: All past Daily Progress Reports, task work logs, and comments submitted by that employee remain permanently saved with their name on them.
- Resetting a Password: Click Reset password next to their name to send them a fresh setup link.