Creating & Sending Invoices
When your site team finishes a major construction milestone, your accounts team can create and send a formal bill (invoice) directly to the client through Planmaster.
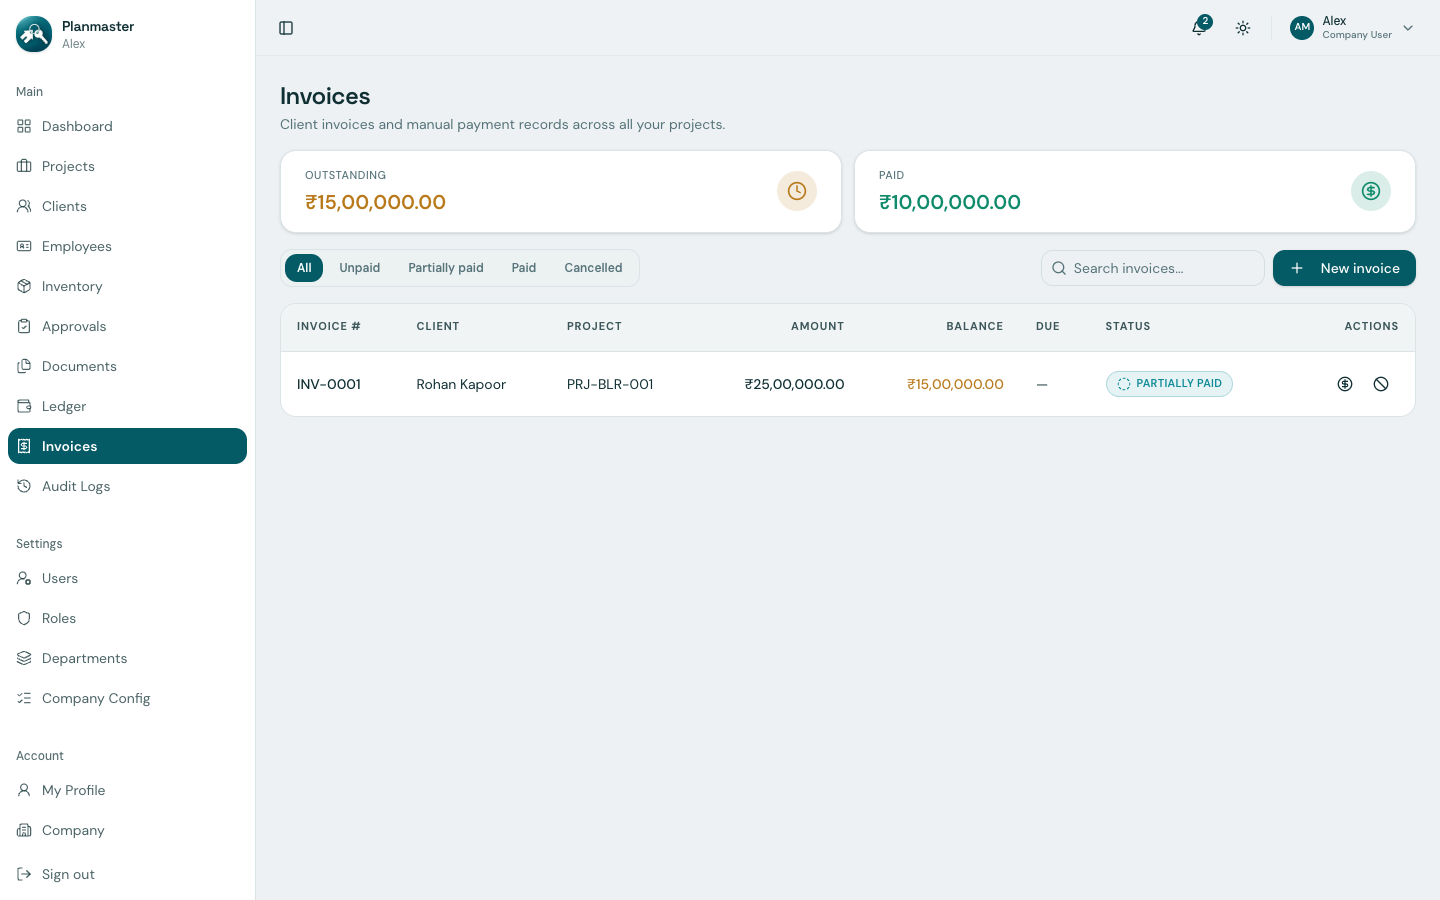
The 4 Invoice Statuses
Every invoice carries a status badge so your team always knows who has paid:
| Status Badge | What it Means |
|---|---|
| Unpaid | The bill has been created but no payment has been received yet. |
| Partially paid | The client made a partial payment (for example: they paid ₹10 Lakhs out of a ₹25 Lakhs bill). |
| Paid | Paid in full! The remaining balance is ₹0.00. |
| Cancelled | The bill was voided using the Cancel invoice action and no longer counts toward outstanding balances. |
You can filter the invoice list by All, Unpaid, Partially paid, Paid, or Cancelled using the tabs above the table.
How to Create a New Invoice (Step-by-Step)
- Click Invoices in the left sidebar menu.
- Click the blue New Invoice button at top-right.
- The invoice creation popup will open:
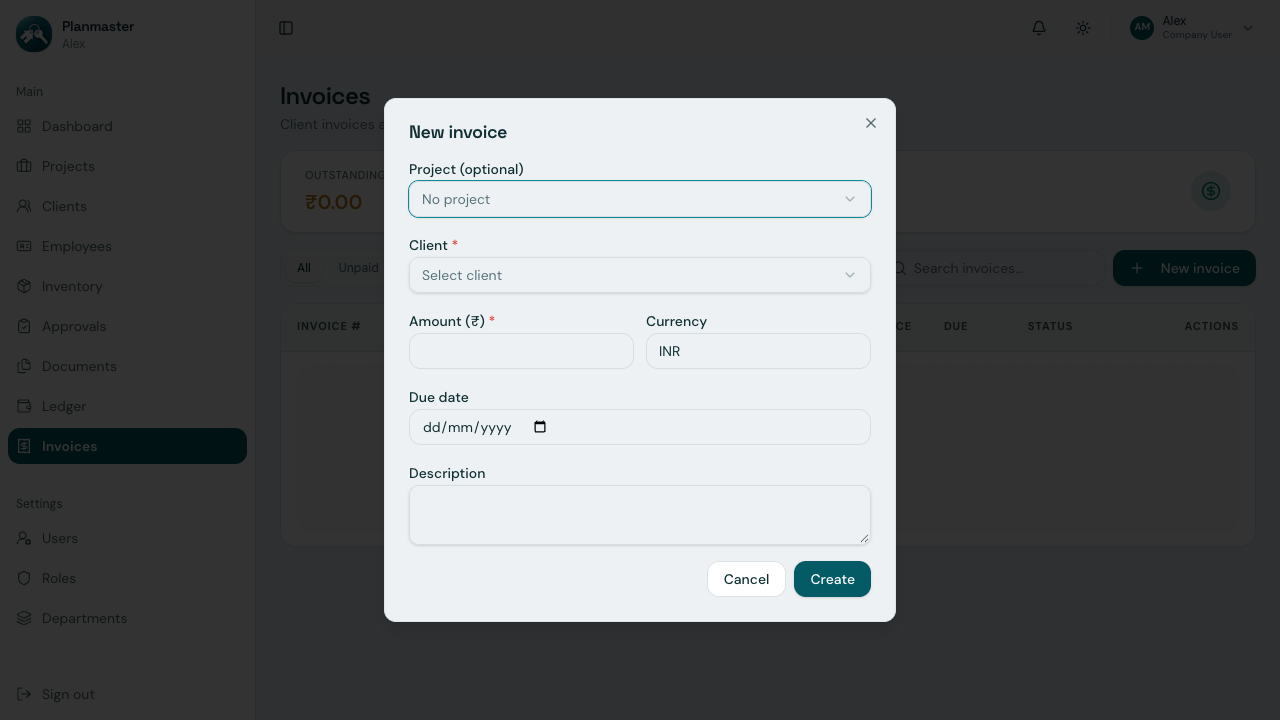
Filling in the Invoice Details:
- Project (optional): Select which project this invoice is billing against (e.g.,
PRJ-BLR-001 - Metro Commercial Complex). You can leave this blank for a client bill not tied to a specific project. - Client *: Select which client this invoice is for. The invoice number (e.g.,
INV-0001) is generated automatically — there is no manual invoice number field. - Amount (₹) *: The total billable amount in Rupees, including taxes (e.g.,
2500000.00). - Currency: Defaults to
INR. - Due Date: The deadline for payment according to your agreement (e.g.,
2026-04-30). -
Description: Milestone notes or billing context (such as: "Claim 1 for Substructure & Foundation completion").
-
Click Create.
Reviewing Your Issued Invoices
Once created, your invoice appears on the main Invoices table:
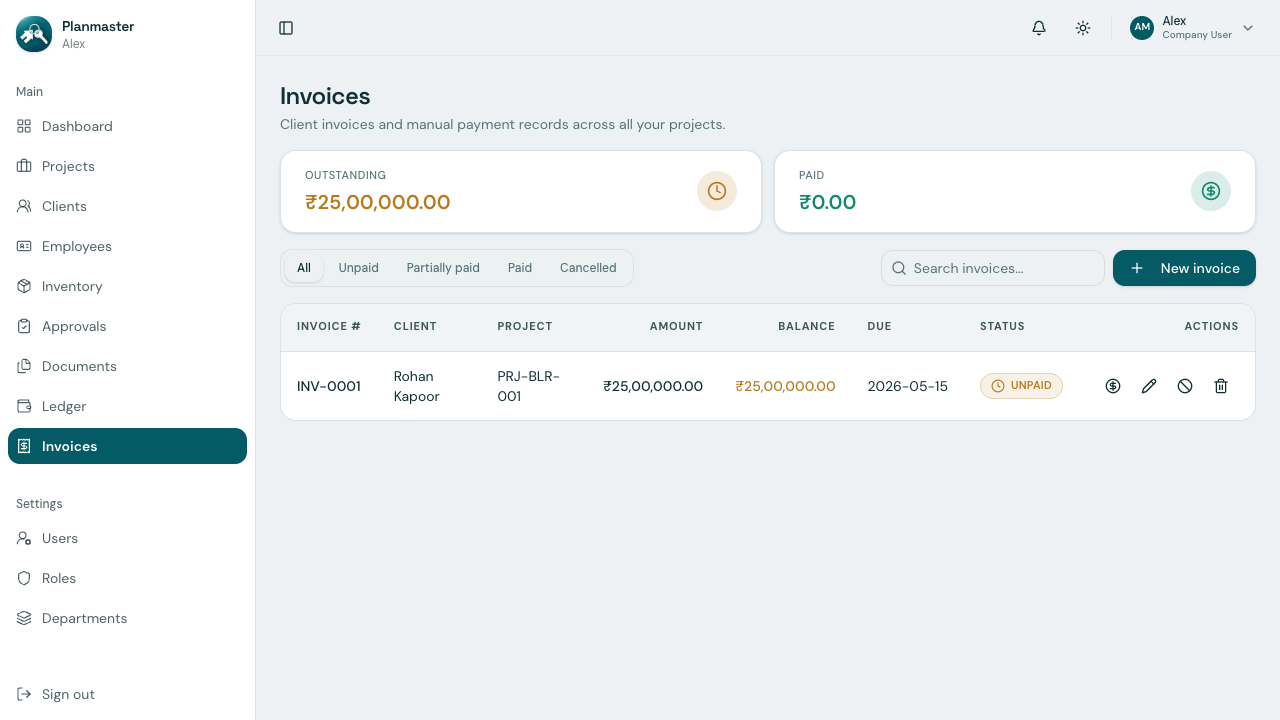
At a glance, you can see: - Total: How much was billed. - Paid: How much money has arrived in your bank account so far. - Balance: Exactly how much the client still owes your company!