Safety & Quality Checklists
Beyond simple task subtasks, Planmaster gives you a dedicated Checklists module for formal, sign-off-style inspections — the kind of paperwork construction sites run every day: toolbox talks, excavation safety checks, concrete pour QA, scaffold inspections, and incident reports.
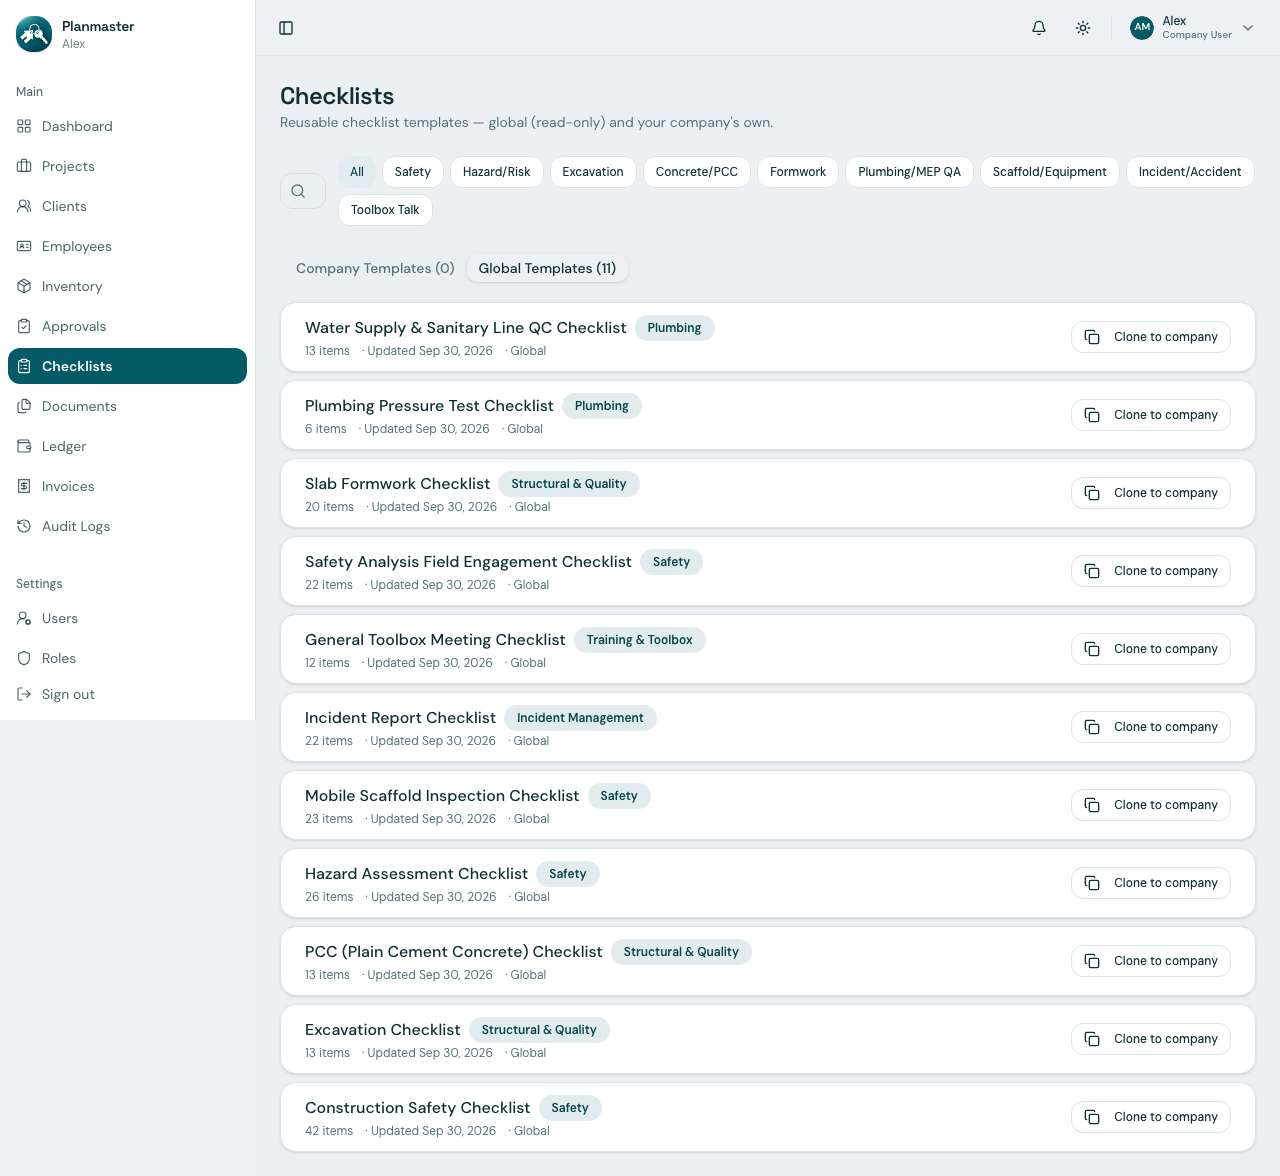
Access this section from Checklists in the left sidebar, or from the Checklists tab inside any project.
Templates vs. Filled Checklists
Planmaster separates the reusable template (the questions) from the filled checklist (the answers logged on a specific project):
- Templates live in the Checklists library (sidebar). Planmaster ships 11 ready-made global templates covering common construction categories — Safety, Hazard/Risk, Excavation, Concrete/PCC, Formwork, Plumbing/MEP QA, Scaffold/Equipment, Incident/Accident, and Toolbox Talk.
- Global templates are read-only. Click Clone to company to copy one into your company's own editable library, or click New template to build one from scratch.
- Filled checklists are created by attaching a template to a specific project, and live under that project's Checklists tab.
Building or Editing a Template
- Go to Checklists in the sidebar, then either click New template or Clone to company on an existing global template.
- Fill in the template basics:
- Name and Category (e.g., Safety, Excavation, Structural & Quality).
- Description: What the checklist is for.
- Active: Inactive templates are hidden from the library by default but aren't deleted.
- Add Items — each question or check point can be configured with:
- Response type:
Pass / Fail / N/A,Yes / No,Rating, orFree text. - Required: Whether the item must be answered before the checklist can be marked complete.
- Advanced options: Turn on extra fields to capture alongside the answer — Remarks, Severity / risk, Corrective action, Sign-off, and Photo evidence.
- Reorder items with the up/down arrows, or delete them with the trash icon.
- Click Save template.
Start from a global template
Rather than building a 20-item safety checklist from scratch, clone one of the 11 global templates and tweak the wording or add site-specific items — it's much faster than starting blank.
Attaching a Checklist to a Project
- Open the project, then click its Checklists tab.
- Click Add checklist.
- Pick a template from your Company or the Global library — or click Create ad-hoc instead to build a one-off checklist without saving it as a reusable template.
- Planmaster immediately creates a filled checklist for that project and opens it for filling in.
Filling Out a Checklist
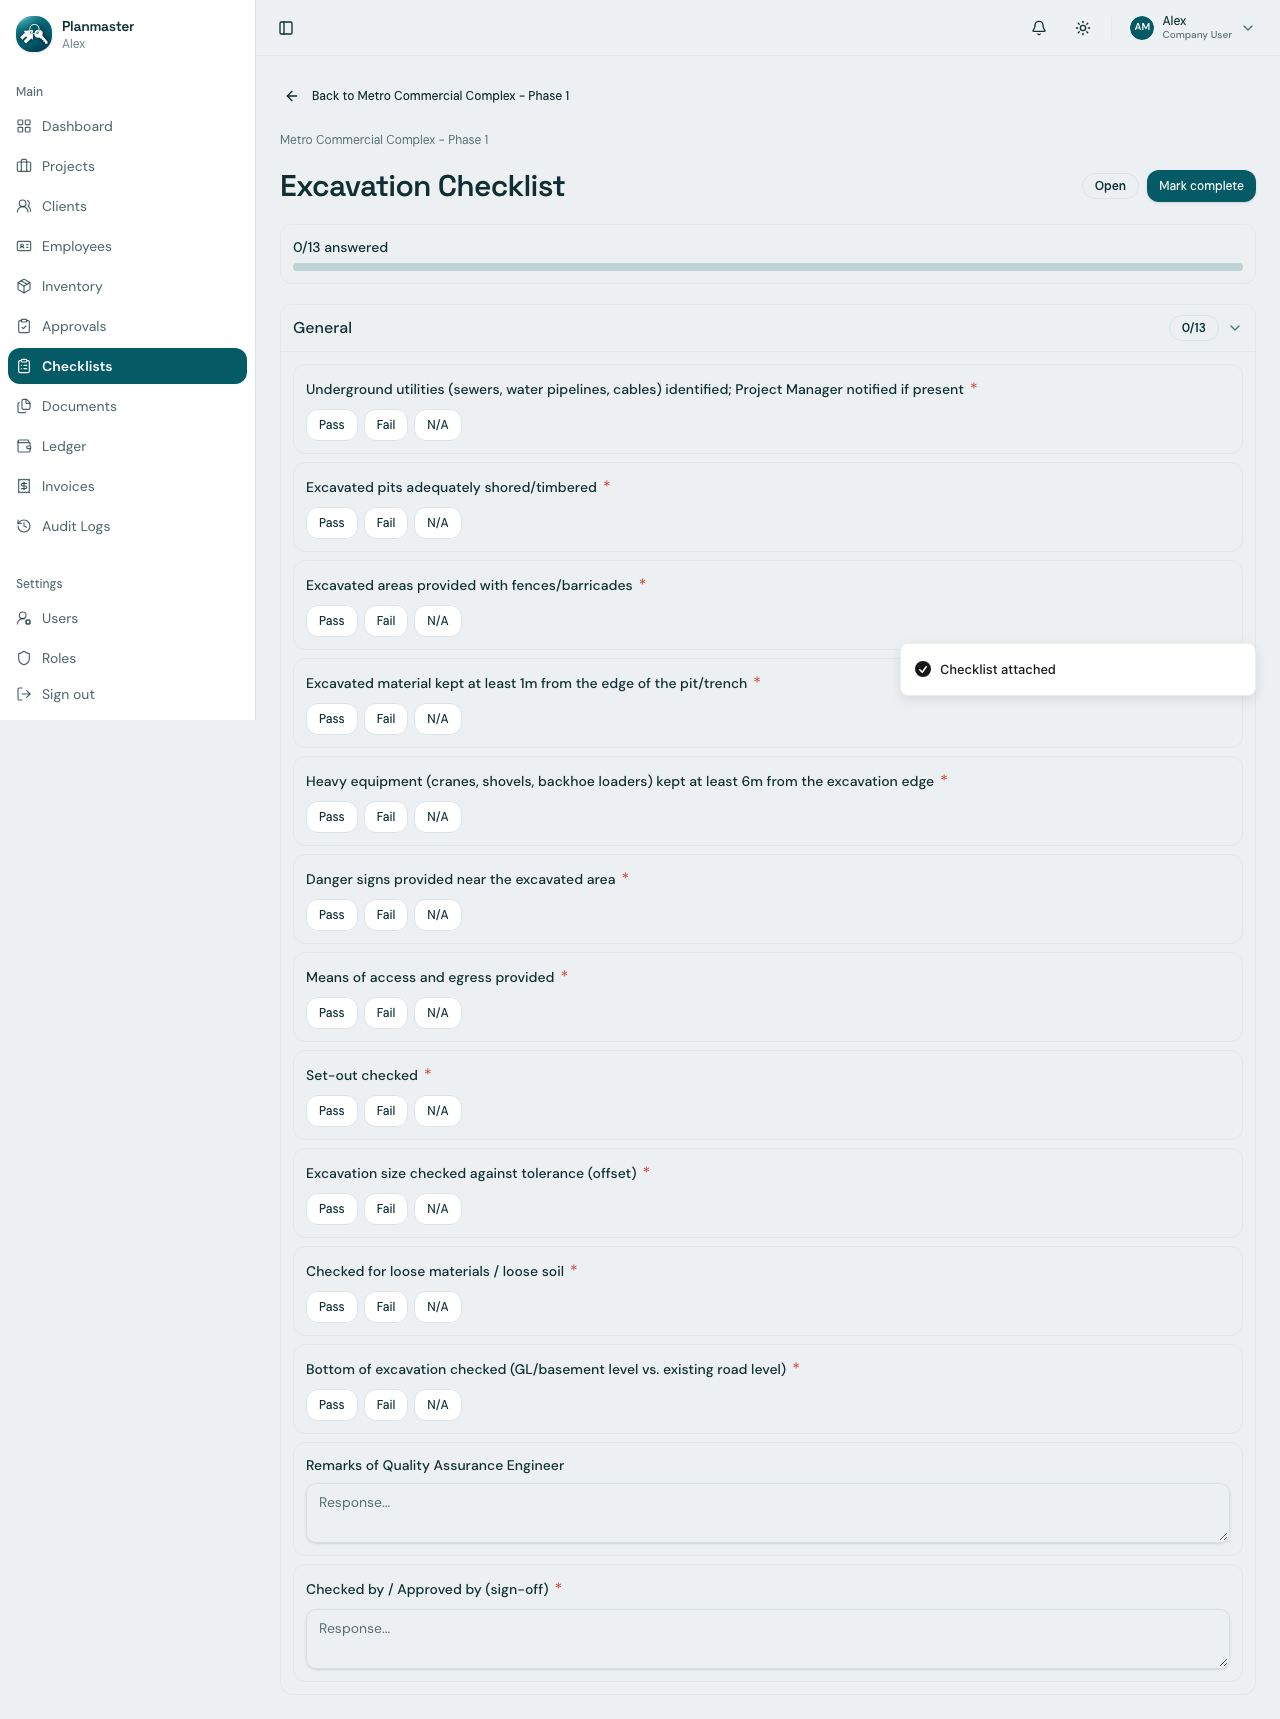
Each filled checklist shows a live progress counter (e.g., 1/13 answered) and groups items into sections:
- For Pass / Fail / N/A and Yes / No items, click the matching button — your answer saves instantly, with no separate Save step.
- For Free text items (like sign-offs or QA remarks), type your response into the box.
- Once every required item has an answer, click Mark complete to close out the checklist.
Required items block completion
If you click Mark complete while a required item is still unanswered, Planmaster blocks it with an error naming the specific item still missing a response — finish every required item first.
Why This Matters for Your Company
- Audit-ready safety records: A signed-off Hazard Assessment or Excavation Checklist is exactly the kind of dated, itemized evidence inspectors and insurers ask for after a site incident.
- Consistent quality control: Cloning the same Concrete/PCC or Formwork checklist across every project means every site engineer checks the same things, the same way, every time.
- Accountability: Each filled checklist is tied to the project and the user who answered it, so there's a clear record of who verified what — and when.