Recording Client Payments
In construction and contracting, clients rarely pay the entire contract amount in a single payment. They often pay in installments—for example, sending ₹10 Lakhs now and the remaining ₹15 Lakhs after site inspection.
Planmaster makes it easy to log every check or bank transfer received, calculate remaining balances, and keep track of who owes what.
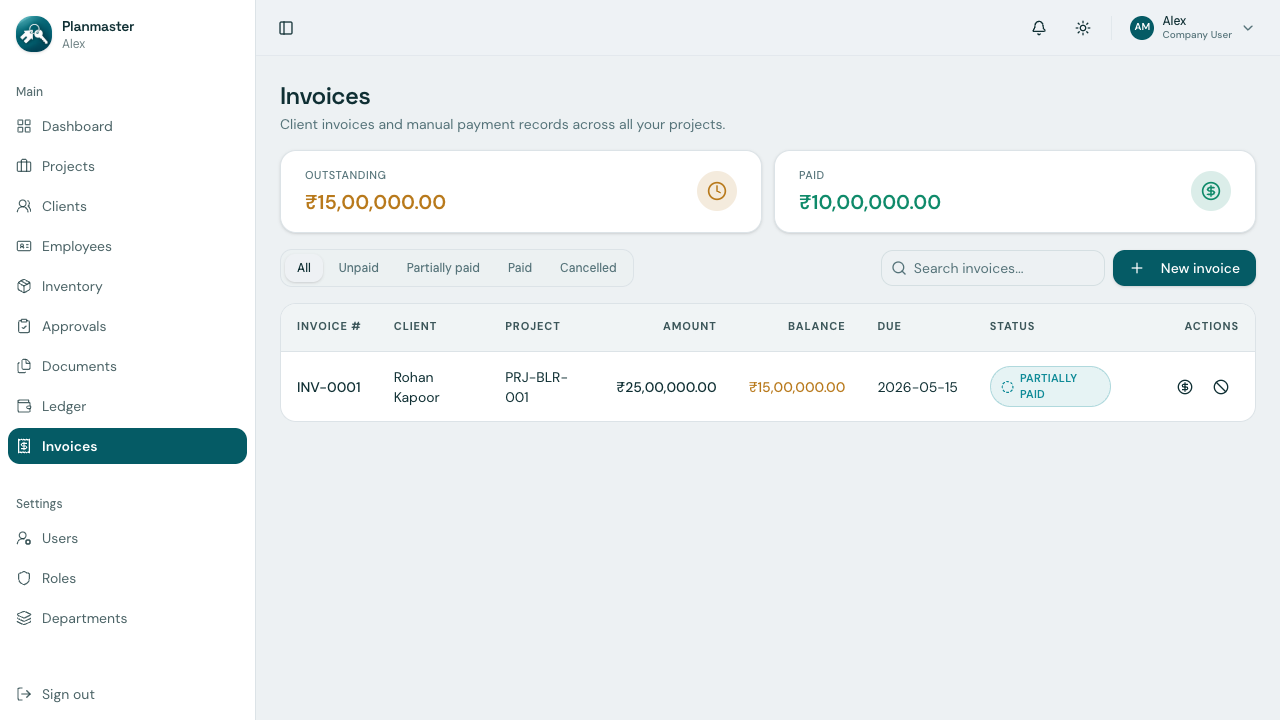
How to Record a Payment (In 3 Simple Steps)
When money arrives in your company's bank account:
- Go to Invoices in the left sidebar menu.
- Find the invoice you are collecting for (e.g.,
INV-0001) and click the Record payment button next to it. - The payment popup will appear, showing the invoice total, amount received so far, and a list of prior payments:
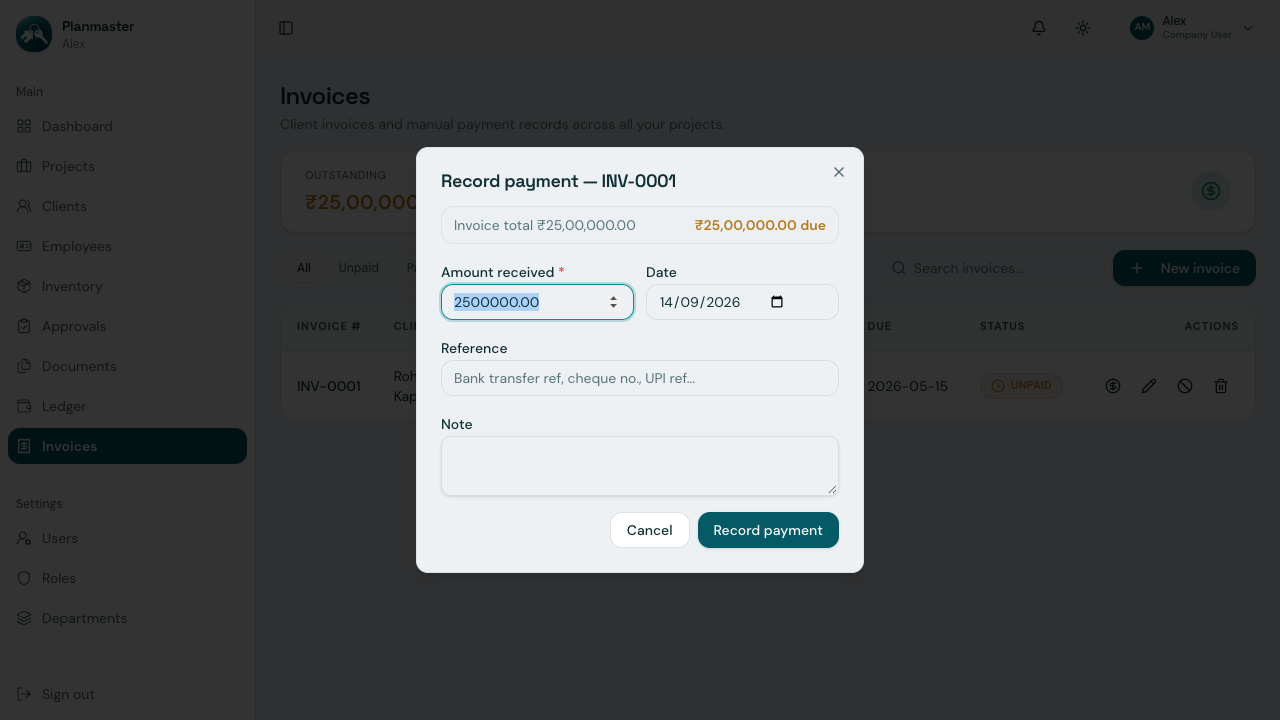
Filling in the Payment Box:
- Amount received *: How much money was received in this payment. This defaults to the remaining balance due, so update it if the client only paid part of that.
- Date: The date the money cleared into your bank account.
- Reference: Enter the bank transfer reference, cheque number, or UPI reference (e.g.,
UTR-HDFC-992817263) for your records. - Note: Any extra remarks (e.g., "First installment received, 2% TDS deducted").
There is no separate payment method field — record the method (Bank Wire, Cheque, Cash, UPI) as part of the Reference or Note.
- Click Record payment.
What Happens Automatically?
You don't need to recalculate spreadsheets. Planmaster updates everything immediately:
- Balance Recalculation: If your invoice was for ₹25,00,000 and the client paid ₹10,00,000, the remaining balance automatically becomes ₹15,00,000.
- Status Badge Update: The invoice badge automatically changes from
UnpaidtoPartially paid. - Paid in Full: When the client sends the final ₹15,00,000, simply record it the same way. The balance drops to ₹0.00 and the status turns green:
Paid! - Cashflow on Dashboard: The received money is immediately reflected in your company's net cashflow on the home dashboard.